In this comprehensive guide, we’ll delve into every aspect of stair construction – from understanding fundamental elements like rail bolts, stringers, treads, and risers to calculating the total rise accurately for your stair installation. We’ll discuss how you can design your own stairs by choosing suitable materials and determining the right number of steps based on your measurements.
You’ll learn about constructing your own stairs: cutting stringers correctly following calculated length & angle details; fixing up treads securely onto prepared stringer sections; laying out risers properly between each consecutive tread; required hardware such as rail bolts and Spring Bolts™. Moreover, we’ll explore finishing touches such as painting/staining options suitable for different types of woods used in building a staircase.
Our discussion wouldn’t be complete without shedding light on the effective use of rail bolts along with Spring Bolts™ during handrail installations to ensure maximum grip support.
Handrail bolts, also known as rail bolts or hanger bolts including Spring Bolts™, are crucial components in the construction of a sturdy and safe staircase. These fasteners connect handrails to newel posts or walls, providing secure support for those ascending or descending the stairs.
Table of Contents:
- Understanding Stair Components
- Measuring for Stair Installation
- Designing Your Stairs
- Constructing Your Own Stairs
- Finishing Touches for Your DIY Staircase Project
- FAQs in Relation to Handrail Bolts
- Conclusion
Understanding Stair Components
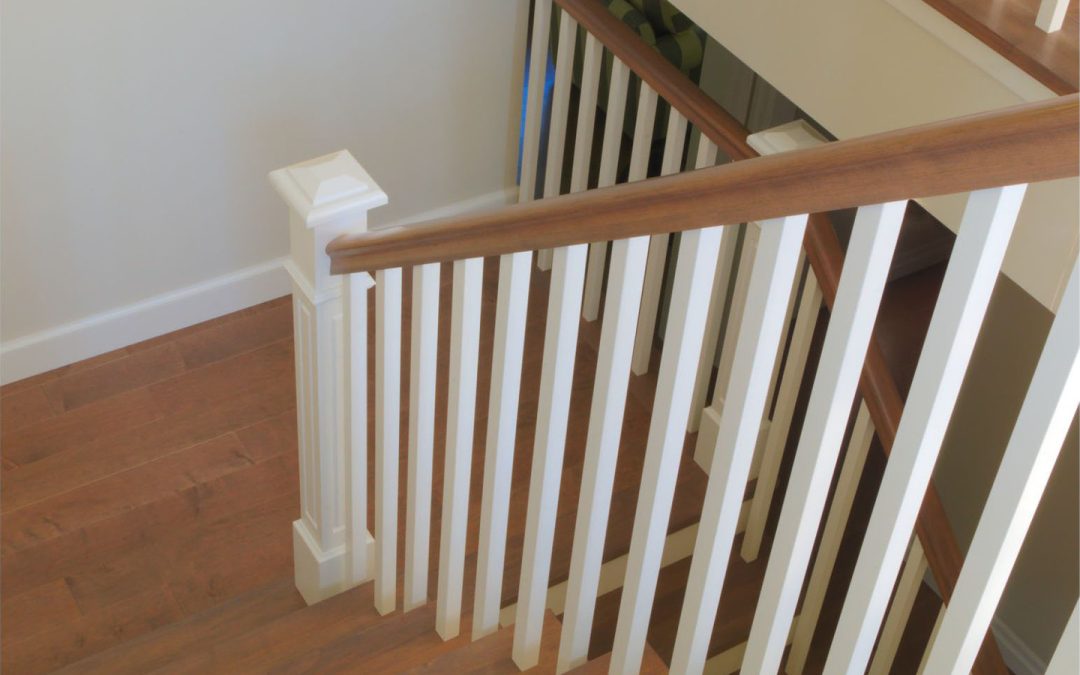
Before you start building stairs, know the three main components: stringers, treads, and risers. Each part plays a unique role in ensuring your stairs are sturdy, safe, and visually appealing.
Stringers: The Backbone of Stairs
The stringer, also known as the ‘spine’ of the staircase, supports the weight of people walking on the stairs and holds everything else together. Typically made from strong materials like wood or metal, they’re cut into a zigzag pattern that forms slots for treads and risers.
Treads: Where Feet Meet Stairs
Treads are the flat pieces that form each step’s top surface. They need to be wide enough for comfortable foot placement while also being able to withstand regular foot traffic without showing signs of wear too quickly.
Risers: The Vertical Elements
Risers connect each tread, forming front face steps and creating enclosed space between them. While optional in some designs, their inclusion can add extra stability and overall look, especially when painted a contrasting color against treads. Be mindful that if you opt to have risers, there should be no more than a 4-inch opening anywhere so as to prevent little ones or pets from becoming trapped.
- Stringers
The backbone of the staircase system, providing support for the entire structure. - Treads
The stepping surfaces you walk along to climb or descend levels in your home or office. - Risers
The vertical elements that connect each tread, forming front face steps.
Remembering these key components will help guide you through your DIY stair-building process with ease and confidence. Check out Family Handyman for more tips and tricks.
Measuring for Stair Installation
When it comes to constructing stairs, precision is key. Accurate measurements ensure that your staircase will not only look professional but also be safe and functional. The first step in this process is measuring the total rise – essentially the height from one floor level to another where your stairs will be installed.
Tools Needed for Measuring Stair Installation Area
You don’t need an arsenal of tools to measure for stair installation. A long tape measure, a pencil, and some paper are all you’ll require initially. If you’re dealing with uneven surfaces or complex angles, a level tool can prove handy as well.
- Tape Measure
This tool helps determine the length and width of your staircase area accurately. - Pencil
To mark out measurements directly on site or jot down figures on paper. - Paper
For recording all necessary dimensions which would come useful during design phase later on. - A Level Tool
Helps ascertain whether floors/walls around proposed stair location are perfectly horizontal/vertical respectively before proceeding further into project plan development stage.
Calculating Total Rise Accurately
The total rise refers to the vertical distance between two levels where your staircase will connect. Start by placing one end of your tape measure at the lower level where your stairs will begin and extend it vertically up to the higher level where they’ll end. Remember if you don’t plan for your top step to be level with your starting point (which is often recommended), adjust this measurement accordingly.
For instance, if each individual step height (riser) was planned 7 inches high & total measured rise came out 70 inches then instead considering ten steps consider nine steps leaving last riser flush against upper landing surface creating seamless transition effect there. Here’s a helpful guide To help calculate these details correctly according specific project requirements.
Key Takeaway:
Measuring for stair installation requires precision and accuracy. All you need are basic tools like a tape measure, pencil, paper, and level tool (if necessary). Calculate the total rise by measuring the vertical distance between two levels where your staircase will connect. Remember to adjust measurements if needed for top step alignment with starting point.
Designing Your Stairs
Measure twice, design once. When crafting your staircase, both aesthetic and safety should be taken into account. Don’t forget to calculate the number of steps based on the total rise – you don’t want to end up with a staircase that’s too steep or too shallow.
Step Up Your Stair Game
Choosing the right material for your stairs is crucial. From classic wood to modern metal and glass, each option has its own pros and cons. Ensure you select a material that is not only strong, but also enhances the aesthetic of your home.
Style and Substance
Don’t forget the little details. The style of your stairs, the width, and the railing design can all make a big difference in the final look and functionality of your staircase. Be mindful of the safety of all users, particularly children and elderly persons.
Take the time to plan everything out properly and avoid any potential issues later on. Check out these resources for more information on stair design and materials:
- Staircase Design Basics
- Choosing the Right Staircase Design
- Staircase Designs for Every Project and Budget
Constructing Your Own Stairs
Ready to take your DIY skills to the next level? Let’s build some stairs. For those ready to take their DIY skills up a notch, let’s begin the stair-building process with this step-by-step guide.
Cutting Stringers: Measure Twice, Cut Once
Stringers are the backbone of your staircase, so it’s important to get them right. Use a stringer calculator to determine the precise measurements, then mark and cut your lumber with a circular saw or jigsaw. Remember: measure twice, cut once.
Attach Treads with Care
Each tread must be level for safe use, so take your time attaching them to the stringers. Position each tread, secure it with screws or nails, and check that it’s level with a spirit level. Repeat until all treads are attached.
Install Risers for a Finished Look
Risers connect consecutive treads and give your stairs a polished look. Make sure they fit snugly between two adjacent steps without any gaps. Use wooden shims or filler materials to fill any gaps, and secure the risers with screws or nails.
Construct a set of stairs that are both visually appealing and practical with these steps. Happy building.
Finishing Touches for Your DIY Staircase Project
Time to make it shine. Final touches enhance safety and usability, especially for kids and elderly.
Paint or Stain?
Choose the right finish for your wooden stairs to protect them from wear and tear. Paint adds color, while stain showcases natural beauty. Check out this guide comparing paint vs stain to decide.
Handrails: Height, Durability, and Ease
Handrails provide essential support when using stairs. For optimal comfort, sturdiness, and installation ease, select a handrail system that meets IBC guidelines. Check out the International Building Code (IBC) for height guidelines. Consider materials like metal or hardwoods for durability. Simplify installation with systems like Spring Bolt™ Railing Hardware.
Remember: A well-built staircase ensures safe passage. Perfect these finishing touches for added peace of mind.
FAQs in Relation to Handrail Bolts and Spring Bolts
How to Use Rail Bolts and Spring Bolts for Stair and Railing Installation
Join wooden parts in stair systems with rail bolts by drilling a hole into both pieces, inserting the bolt, and tightening the nut with a wrench.
What is a Rail Bolt? What is a Spring Bolt?
A rail bolt, also known as a staircase bolt, is a specialized fastener designed for joining wooden parts in stair systems such as handrails and newel posts. A Spring Bolt is a tested, patented fastener used for connecting rails and posts, designed to be quick to install and to create strong, concealed joints. It eliminates the need for unattractive wood plugs typically used in traditional rail joint hardware.
The Best Joint for Handrails
An angled scarf joint secured with high-quality handrail fasteners is typically considered the best joint for a handrail.
How to Secure a Handrail
Position the handrail correctly along the stairs, drill holes into both wall studs and railing ends, attach brackets with screws, and ensure they’re tight.
Remember to avoid discussing unrelated DIY projects or home improvement tasks, and do not mention specific brands, retailers, or prices for handrail bolts and related products.
For more information on stair and railing installation, check out these credible sources: This Old House and The Family Handyman.
Introducing Spring Bolt™: The Ultimate How-To Videos for Stronger Connections
Spring Bolt™ is revolutionizing the world of construction with its incredible tool that saves time, money, and ensures a stronger connection.
The Spring Bolt™ is a system for connecting rails and posts, invented by Roger Rock, a veteran in the construction industry with over 30 years in the stair and railing business. The Spring Bolt™ system was designed to eliminate the need for large, unattractive wood plugs that are typically used to cover traditional rail joint hardware.
The Spring Bolt™ system offers several advantages:
- It creates a blind or concealed attachment, meaning the hardware is not visible once installed.
- It can be installed with just two common tools.
- It can be installed in a relatively short period of time.
- It requires a moderate level of skill to install.
- It works on 90-degree joints.
- It can carry the required loads.
Interestingly, while the aesthetic improvement was the main goal of the Spring Bolt™ system, it also turned out to be quicker to install than other hardware, requiring just two minutes for installation. It also requires just one drill bit and one driver to install. This makes it possible for a person with a moderate skill level and basic tools to install wood railings with stronger and tighter joints in a fraction of the usual time.
Inventor Roger Rock has developed a series of helpful how-to videos that will guide you through the process of using Spring Bolt™ effectively in your projects.
These videos are designed to empower DIY enthusiasts, contractors, and homeowners with the knowledge and skills they need to achieve exceptional results. Whether you’re working on building a staircase, installing railings, or any other construction project that requires a secure connection, these videos will walk you through every step, providing clear instructions and valuable tips along the way.
With Spring Bolt™ and our comprehensive how-to videos, you can take your projects to the next level, confident in the strength and reliability of your connections. Say goodbye to guesswork and hello to success with Spring Bolt™!
- How To Install Post & Railings, Attachment Hardware For Installing Railings with Spring Bolt™
Learn how to install post and railings effortlessly with Spring Bolt™ attachment hardware. Achieve a secure and reliable connection in no time. - Spring Bolt™ Rail to Post Ends Connector
See how the Spring Bolt Rail to Post Ends Connector simplifies rail to post installations. - Spring Bolt™ Rail to Rail Connector
Watch the Spring Bolt Rail to Rail Connector in action. Join rails effortlessly with this innovative connector. - Spring Bolt™ Post to Floor Connector
Witness the Spring Bolt Post to Floor Connector in action. - Make 90 Degree Joints In 1.5″ D. Wood Rail with Spring Bolt™
Master the art of creating 90-degree joints in 1.5″ diameter wood rail. - Spring Bolt™ Stainless Steel Railing Hardware
Discover the power of Spring Bolt Stainless Steel Railing Hardware.
Conclusion
Designing and building a safe and sturdy staircase requires accurate measurements and careful material selection.
Don’t skimp on handrail bolts – they’re essential for maximum grip support.
DIY enthusiasts, contractors, and homeowners alike can confidently tackle staircase projects by following these guidelines.
Remember: aesthetics matter too – choose materials that look good and last long.
For more information on staircase design and construction, check out these valuable resources:
Questions?
Are you ready to take your construction projects to the next level with Spring Bolt™ Railing Hardware? If you have any questions or comments, we encourage you to reach out to the inventor of Spring Bolt™, Roger Rock. Simply use the contact form on our website to submit your inquiries. Roger is dedicated to providing helpful guidance and support to DIY enthusiasts, contractors, and homeowners. Don’t hesitate to get in touch and unlock the full potential of Spring Bolt™ for your projects. Experience the difference of strong and secure connections with Spring Bolt™ today!